Bussing Tutorial
From Sonar
Home Page * Getting Started * Workflow * Tips, Techniques and Tutorials * Errors and Workarounds * Making Music * Composing, Arranging & Songwriting * Optimizing Your DAW * Recording Gear * Included Components * Third-Party Effects * Third-Party Virtual Instruments * Computer Systems and Components * Free Downloads * External SONAR resources
Bussing Tutorial
This is an introduction to why and how to create and use busses in SONAR. I hope somebody finds it useful. (The tutorial is also available as a ZIP file containing a Word document and an Excel spreadsheet here). --Geoff Francis
This tutorial aims to illustrate a simple example of how bussing works in SONAR. When you finish it, you will have created a project which includes:
- Three audio tracks – Vocal, Guitar and Other
- One Main Output Buss
- Two auxiliary send busses for reverb and chorus
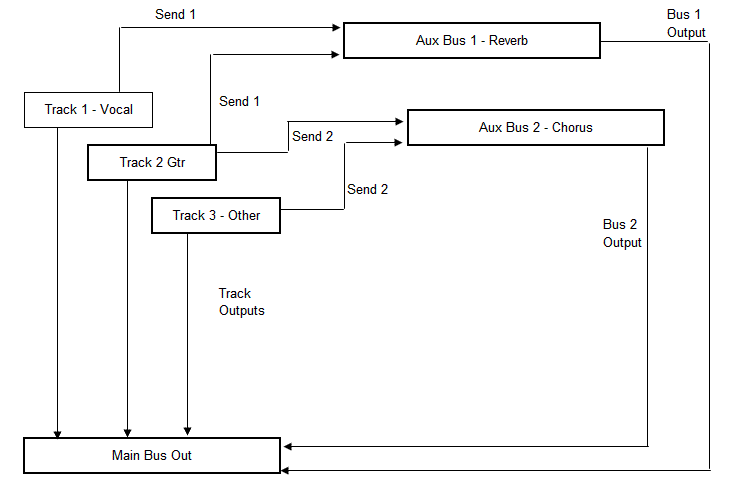
See the diagram at the end of the tutorial for more details.
You will also need three existing wave files from any earlier project – one vox, one guitar and one other, for importing into this project.
OK, here we go:
- Create a new SONAR Project file using Normal template. Display Track View.
- Delete all tracks and busses from this file. We’re going to start from scratch.
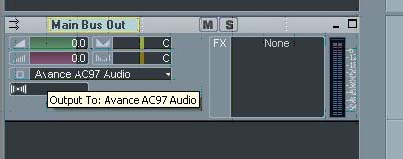
- To start, let’s create the Main Buss Out. This will be used to direct our output to the sound card.
- Right click in the buss pane area, choose Insert Stereo Buss.
- Change its name to Main Buss Out. Direct the output of this buss to your sound card.
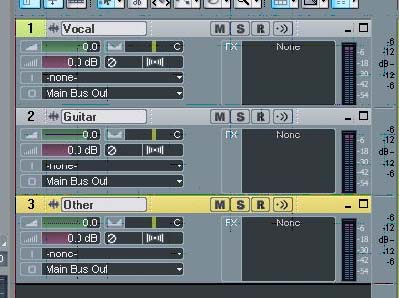
- Now go to the track pane, right click on it and choose Insert Audio Track.
- Repeat this twice.
- Rename each track so Track 1 is Vocal, Track 2 is Guitar and Track 3 is Other (whatever other source you are using).
- Hit CTRL+A to select all tracks, and then from Menu select Tracks, Property, Outputs and from the list choose Main Buss Out then OK.
- Now select Track 1 and select File, Import Audio.
- Select the vocal track and import it.
- Repeat this for Track 2 (Guitar) and Track 3 (Other).
- You should now be able to play the three tracks back and will see activity in all meters and be able to hear them. Of course you can adjust panning, volume etc to suit.
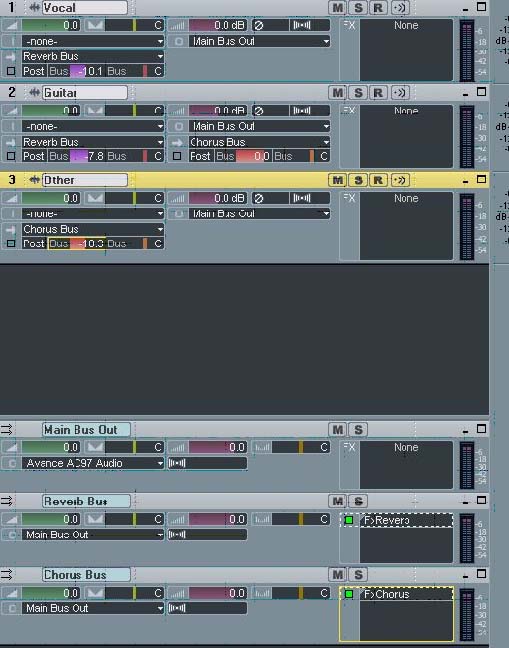
- Now to create the Reverb Buss.
- In buss pane, right click and choose Insert Stereo Bus.
- Rename this Reverb Buss.
- Direct its output to Main Buss Out.
- Insert a reverb plug-in in the FX Bin (right click over the bin to get to the menu to do this):
- Now to create sends for vocal and guitar to send to the Reverb Buss.
- Right click in track pane in vocal track area, choose Insert Send and then Reverb Buss.
- Set Send Level for Buss to about –10dB. Make sure you enable the buss by setting the little green light on.
- Now play. As you adjust the Send Level, you should find that you can hear the reverb.
- Repeat this for the guitar track.
- Now to create the buss and sends for chorus. Here’s your chance to do it yourself!
- Using the same method as steps 5 and 6 above, create a new buss in the buss pane.
- Rename it Chorus Buss.
- Direct its output to your Main Buss Out and insert a chorus FX plug-in.
- Now add a send to the guitar track (Track 2) and the other track (Track 3), in both cases directed to the Chorus Buss. Adjust levels to suit.
- Now have another look at the flow chart. Does it make sense?
Home Page * Getting Started * Workflow * Tips, Techniques and Tutorials * Errors and Workarounds * Making Music * Composing, Arranging & Songwriting * Optimizing Your DAW * Recording Gear * Included Components * Third-Party Effects * Third-Party Virtual Instruments * Computer Systems and Components * Free Downloads * External SONAR resources


