DecoderPro
From Jmri
m |
(Added first gif) |
||
| Line 6: | Line 6: | ||
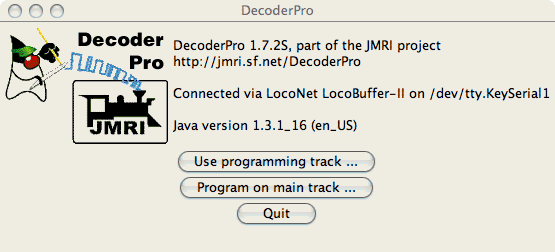
This page assumes you already have a working installation. If not, please refer to the relevant section on [[DebuggIng]] for instructions. Note that until you can start Decoderpro and the initial screen says something like that shown here: | This page assumes you already have a working installation. If not, please refer to the relevant section on [[DebuggIng]] for instructions. Note that until you can start Decoderpro and the initial screen says something like that shown here: | ||
| + | [[Image:DP-welcome.gif]] | ||
Given a working install its probably best to start by reading the data from your existing decoders into the program. | Given a working install its probably best to start by reading the data from your existing decoders into the program. | ||
Revision as of 19:36, 15 February 2006
DecoderPro
Is, quote, "a better tool for programming decoders. DecoderPro simplifies the job of configuring complicated DCC decoders by providing screens on which you can select the various options and values you want."
In other words, it's a collection of screens with input buttons, boxes, sliders and the like that display data as read from, or which may be written to, your decoders. This visual approach hides the complexity of calculating hex values and programming with arcane single button commands. Furthermore, a huge number of decoders are 'known' by the system, thereby ensuring only relevant options and settings are permitted. For exampe, options in a QSI sound decoder are very different to the options in a Digitrax DZ123.
This page assumes you already have a working installation. If not, please refer to the relevant section on DebuggIng for instructions. Note that until you can start Decoderpro and the initial screen says something like that shown here:
Given a working install its probably best to start by reading the data from your existing decoders into the program.
Having done that, you can start changing things. Oh, you want to know how to do that!? :-)
The notes that follow are from my install using a Digitrax Zephyr, MacOSX on a Powerbook G4 and a LocoBuffer II connected via a Keyspan adaptor to a USB port. However, as long as you have a working installation pretty much everything is platform and OS indepedent and should therefore apply equally to people using Windows PCs and Linux.
Programming using a programming track
The Zephyr (and many others) have seperate outputs to feed an isolated programming track. This isolated track can be as simple as a section of track connected to the programming outputs on the command station with a couple of test leads through to a siding connected to the main layout via insulating joiners and a DPDT switch. The DPDT passes regular track power in one position and the programming outputs in the other. [See the 'discussion' page (above) for some notes on this setup.]
Put (or drive, on the layout!) a decoder equipped loco onto your programming track. From the Decoderpro main screen select 'Program on programming track' and window shown below will open:

